Excelerious 2016 is
an initiative to inspire thousands of students & young professionals
through a competition to learn the professional facets of Microsoft Excel. The
competition contains training, workshop and counseling sessions on professional
insides of using Microsoft Excel application.
In Excelerious 2016, one can participate in
workshop, seminar, boot-camp [3 days for the high scorers only], career
counseling and a chance to win 50,000 BDT. The program is expanding through
partnerships with academia, industry & media. It is expecting some exciting
engagements with Silicon Valley for keynote speakers in seminars and boot camp.
First participants will have to go through
registration. After successful registration students will be added to a
facebook group. In the group students will be provided with various tutorials about
effective usage of Microsoft Excel. Then after a competition 15 participants
will be selected. They will attend a three days boot camp and learn more about
Excel. After that the finalist will be selected after numerous contest.
The eligibility of the contest are:
If you are not alien and you are not
thinking yourself any super human brain which needs no training for skill
development,
You are ELIGIBLE for the competition.
If you have no idea about Excel,
You are eligible
Because you will be taught and
develop the skill on Excel first through Workshop then you have ground to
compete.
If you are Engineering student
or any technical subject and think MS Excel is only for the Business
Students, You are ELIGIBLE.
Because “MS Excel skill is
needed in any corporate job
Find detail & necessary information about
the competition: www.excelerious.com
প্রোগ্রামিং এ যারা ক্যারিয়ার গড়তে চান, সবারই একটা কমন কিউরিসিটি থাকে, কি কি শেখা উচিত একজন সফল প্রোগ্রামার হওয়ার জন্য কিংবা বড় বড় সফটওয়্যার কোম্পানি গুলো কি চায় আপনার কাছে দক্ষতা হিসেবে?
আপনিও জানেন শুধু প্রোগ্রামিং ল্যাঙ্গুয়েজ যেমন জাভা অথবা সি++ এ ভালো হওয়ায় যথেষ্ট নয়, কোড ওয়ার্ল্ড এর বাইরেও অনেক কিছুই জানতে হয় প্রতিদ্বন্দ্বিতা করার জন্য।
এখন প্রশ্ন হলো কি কি শিখতে হবে আপনাকে সফল প্রোগ্রামার হওয়ার জন্য?
বেশ কিছু সফল প্রোগ্রামার আর আমার অভিজ্ঞতা থেকে আপনাদের জন্য কিছু সাজেশনঃ
১) একে একে আপনাকে দক্ষ হতে হবে কমপক্ষে তিনটি খুবই আলাদা প্রোগ্রামিং ল্যাংগুয়েজে। যেমন ধরুন একটি মিড লেভেল ল্যাংগুয়েজ (জাভা অথবা সি) , একটি হাইলেভেল ল্যাঙ্গুয়েজ (পাইথন), এবং একটি ওয়েব নির্ভর ল্যাঙ্গুয়েজ (জাভাস্ক্রিপ্ট) বা অভিজ্ঞতা করুন কোন ডাটাবেজ ম্যানেজমেন্ট (এসকিউএল) । যখন আপনি এগুলো ভালোভাবে জেনে যাবেন তখন এইধরণের যেকোনো ল্যাঙ্গুয়েজে যেকোনো কাজের জন্য খুব সহজেই এবং খুব দ্রুত মানিয়ে নিতে পারবেন।
২) যতটা সম্ভব টিম ওয়ার্ক করুন আর বাড়ান আপনার যোগাযোগের দক্ষতা। অনেক ইঞ্জিনিয়ার এবং প্রোগ্রামার প্রায়ই তাদের নিজের কাজের প্রতি একটু বেশিই ফোকাস করে এবং দেখা যায়, তারা শিখতে ব্যর্থ হয় কীভাবে অন্যদের সঙ্গে কাজ করবে এবং কমিউনিকেট করবে। এটা আপনাকে খুবই সাহায্য করবে যখন আপনি ইন্টার্ভিউ দিবেন এবং সবসময় আপনাকে প্রতিযোগিতায় একধাপ এগিয়ে রাখবে।
৩) একটি পোর্টফোলিও তৈরি করুন, এবং ব্যবহার করুন জন্য গিটহাবের মত কোড শেয়ারিং সাইট আপনার কোড শেয়ার এর জন্য এবং কোড এর লিঙ্ক যুক্ত করুন আপনার রিজিউমিতে।
৪) যতটা পারুন আপনার নিজের আইডিয়া নিয়ে প্রজেক্টবেজ কাজ করুন অথবা ওপেনসোর্স প্রোজেক্ট নিয়ে কাজ করুন। আর হ্যাঁ শুভ কামনা ভবিষ্যত এর জন্য ।
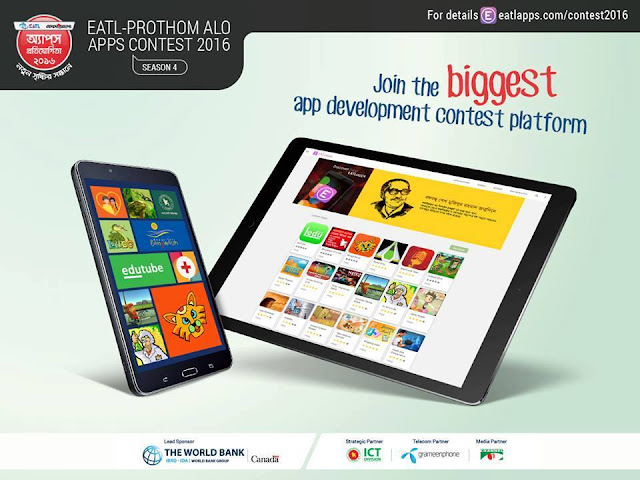
For participating, you have to submit an ideafirst. If your Idea is selected then they will arrange a boot camp with you. In the boot camp they will help you making the app. The final submission is in December. So if you have any idea, jump up. Hurry!
Its a good news for all that BASIS, through Skills for Employment Investment Program (SEIP) will to train up 23,000 over the contract period of 3 years. 5000, 9000 and 9000 trainees will be trained in the 1st, 2nd and 3rd year respectively. BASIS institute of Technology & Management (BITM) is planning to proposed twelve courses for new entrants and two courses for up skilling programs under this SEIP project. Eligible members of BASIS Student Forum will get preference to enroll in this training program under SEIP project.
All the offered training programs are totally free.
The minimum qualification to get enrolled in this program is Graduation or Diploma in Engineering depending on the training course.
One trainee can do only one training program under this project.
Each trainee will be given BDT 3,120 per month as training allowance. But to get this benefit, trainee must ensure attendance at least 80% of total classes conducted and abide by all the rules and regulation of the BITM
Certainty of Job placement.
Offered training program..
Web Design
Expected Benefits to the Sector:
After completion of this course the participant will be able to do
Design and build websites using HTML 5 and CSS 3.
Work with Forms, Canvas, Audio, Flash, Video and downloadable content.
Web graphics, logo, banner, graphics optimization and Hosting.
Will work as Web Designer or Web Developer in local and global IT firms, telecom industry, corporate houses, banks, government agencies etc. or as Freelance professional.
Graphics & Web UI design
Expected Benefits to the Sector:
After completion of this course the participant will be
Skill on Illustrator and Photoshop
Skill on creating Icon, Logo
Good at UI Design for Web and Mobile Apps; Clipping Path, Layout Design.
Images Prepare for HTML
Job Placement:
Will work as Graphics & Web UI design or Design Support with Web Developer in local and global IT firms, telecom industry, corporate houses, banks, government agencies etc. or as Freelance professional.
Digital Marketing
Expected Benefits to the Sector:
After completion of this course the participant will be able to do
An improved understanding of social media and its different uses
The ability to identify and analyse the key social media platforms for specific target groups and business goals
An understanding of the processes involved in managing and monitoring social media efforts
The ability to design a social media marketing or communication strategy for a company or organization
The ability to develop a social media policy
Job Placement:
After completing this training program, the trainee will have a proper knowledge on Digital Marketing and will able to work any organization as Digital Marketing Professional. Or, he can choose his profession as a freelancer and can work in outsourcing marketplace.
Web Application Development- PHP
Expected Benefits to the Sector:
After completion of this course the participant will be able to do
Creating dynamic website using PHP-MySQL platform
Creating web application software
Job Placement:
After completing this training program, the trainee will be able to work as a professional web application developer in a local market as well as offshore market place.
Web Application Development- Dot Net
Expected Benefits to the Sector:
Will work as software professionals in local and global IT firms, telecom industry, corporate houses, banks, government agencies etc.
Job Placement:
After completing this training program, the trainee will be able to work as a professional web application developer in a local market as well as offshore market place.
Practical SEO
Expected Benefits to the Sector:
After completing training course it is not necessary for to do a job in any company for monthly income because also can start own company and earn good money by working on various SEO projects outsourced by many countries.
Job Placement:
After completing this training program, the trainee will have proper knowledge on Digital Marketing and will able to work in any organization as Internet Marketing Professional. Or, he/she can choose profession as a freelancer and can work in outsourcing marketplace.
Mobile Application Development (Android)
Expected Benefits to the Sector:
Develop and test real time Android applications that serves as a working example of the topics covered in class.
Have a comprehensive knowledge of Android's APIs.
Have a sound idea about various types of real time applications
Job Placement:
Opportunities are same in the local market as well as offshore market to work as a mobile application developer.
Server Administration & Cloud Management
Expected Benefits to the Sector:
This course provides trainees a fundamental background of IT Administration and includes an introduction to setting up an IT environment in a corporate office. The main objective of this course is to assist IT fresh graduate to prepare them for IT industry for IT administrative job. After successful completion, they will be able to work in any network server environment as a junior system admin.
Job Placement:
After completing this program, the trainee will have the knowledge to work as a Server Administrator in any local company.
IT support Technical
Expected Benefits to the Sector:
By the end of the course participant should be:
Proven techniques for improving on-site customer interaction
How service level agreements impact workflow and prioritization of requests
Seven key steps for effective root cause analysis
Job Placement:
After completing this program, the trainee will have the knowledge to work as an IT support technical to any local organization.
Affiliate Marketing
Expected Benefits to the Sector:
After completing training course it is not necessary for to do a job in any company for monthly income because also can start own company and earn good money by working on various projects outsourced by many countries.
Job Placement:
After completing this training program, the trainee will have a proper knowledge on Affiliate Marketing and he can choose his profession as a freelancer and can work in outsourcing marketplace.
Customer Support & Service
Expected Benefits to the Sector:
This customer service skills training course will develop the participants' skills and behaviour to offer exceptional customer care and services and to empower participants to provide effective solutions to customer service problems when they arise.
Job Placement:
After completing this program, the trainee will be able to work in any local company (Call Centre, Telecommunication & IT company) as customer support executive.
IT Sales Management
Expected Benefits to the Sector:
By the end of the course participant should be:
Develop and build upon their rapport building skills
Effectively handle, and overcome, objections
Stay motivated and project a genuine caring attitude
Win customer loyalty and repeat business
Job Placement:
After completing this training program, the trainees will be able to work under any local IT companies as a IT Sales Executive.
English & Business Communication
Expected Benefits to the Sector:
Understand The Impact Of Different Communication Styles
Increase Confidence To Speak To Large Audiences
Able To Write Successful Proposals
Solve Problems Using Communication Strategies
Job Placement:
This training program will enhance the communication skill of the currently employed employees.
আমরা কমবেশি সবাই অনলাইনে আয় করি বা আয়ের চেষ্টা করি আর এই কজের বিনিময় অর্জিত অর্থ সরাসরি আমাদের হাতে আসে না। এর জন্য প্রয়োজন একটি অনলাইন একাউন্ট। বিভিন্ন কম্পানি বিভিন্ন একাউন্টে ডলার দেয় যেমন : PayPal, Payza, skrill, solidtrust ইত্যাদি। তার মধ্যে PayPal একটি গুরুত্বপূর্ণ একাউন্ট এবং PayPal বাংলাদেশ থেকে ভেরিফাই করা একটু ঝামেলার ও সময় সাপেক্ষ ব্যাপার। এজন্য আমি আপনাদের দেখাব কিভাবে বাংলাদেশ থেকে PayPal Verify করা যায়। আগে পুরো টিউন পড়ুন এরপর একাউন্ট করুন।
PayPal Verify এর জন্য প্রয়োজন একটি Online Bank Account একটি Credit/debit card একটি Foreign Phone no ও PayPal App. এজন্য আপনাদের আগে Bank Account ও Credit/debit card সংগ্রহ করতে হবে আর আপনারা এই দুটি সেবা পাবেন Payoneer.com এ। তাই আপনাদের Payoneer এ সাইন-আপ করতে হবে। জাদের শুধু MasterCard লাগবে তারাও আমার এই টিউন দেখে একাউন্ট করে নিতে পারেন। আসুন দেরি না করে এখনি একাউন্ট করে নিন সমস্যা হলে হেল্প করব ইনশাআল্লাহ্...
কেউ শুধু ২৫ ডলার বোনাস এর আশায় Payoneer Account খুলবেন না ২৫ ডলার ফ্রী পাবেন তবে আপনাকে প্রথমে ১০০ ডলার লোড করার পর ২৫ ডলার বোনাস পাবেন। আপনি যদি ফ্রিল্যান্সার না হন বা অনলাইনে আয়ের কোন উৎস না থাকে তবে দয়া এই কার্ড এপ্লাই করে অযথা দেশের ক্ষতি করবেন না।
নিচের পিকচার এর মত আসলে Sign Up & Earn $25* বাটনে ক্লিক করুন।
১. এখন এখানে ২ নং পিকচার এর মত 2 টি ধাপ অনুসরন করতে হবে। (a)- Local Bank Account (b)- Prepaid MasterCard® Card
২. আমাদের যেহেতু কার্ড লাগবে এজন্য Prepaid MasterCard® Card সিলেক্ট করে SIGN UP এ ক্লিক করুন।
৩. Prepaid MasterCard® Card সিলেক্ট করার পর ৩ নং পিকচার এর মত আসবে। এখানে আপনার NID কার্ড অনুযায়ী Fast name এর ঘরে, নামের প্রথম অংশ ও Last Name এর ঘরে নামের শেষ অংশ এবং জন্ম তারিখ দিয়ে Next এ ক্লিক করুন।
৪. এখাণেও আপনার NID কার্ড অনুযায়ী ঠিকানা দিন। সাইনআপ করার সময় নাম ও ঠিকানাতে : . / + এধরনের চিনহ দিবেন না, আর আগে থেকে একই NID কার্ড দিয়ে আবেদন করে থাকলে নতুন করে এপ্লাই করবেন না। সঠিক মোবাইল নং দিবেন কারন একাউন্ট ভেরিফিকেসনের সময় এই নং লাগতে পারে Next এ ক্লিক করুন।
৫. এখাণে Password এর ঘরে YourName007 এভাবে password দিবেন। R Security question এ অবশ্যই যেটা মনে রাখাতে পারবেন সেরকম দিবেন। দিয়ে আবার Next এ ক্লিক করুন।
৬. এখানে Gov NID সিলেক্ট করে আপনার Nid No দিয়ে বাংলাদেশ সিলেক্ট করে দিন। Enter alternate shipping address এখানে আপনি যদি NID এর ঠিকানা অনুযায়ী কার্ড নিতে না চান ত এখানে টিক দিবেন, তাহলে নতুন ঠিকানা চাইবে। এখানে যে ঠিকানা দিবেন সেই ঠিকানায় কার্ড পাবেন। এরপর সব বক্কক্সগুলোতে টিক দিয়ে ORDER এ ক্লিক করুন।
৭. আপনার Payoneer এর Registration সম্পন্ন হয়ে গেছে। এবার ইমেইলে লগিন করুন, পেয়নিয়ার থেকে পাওয়া ইমেইলটি ওপেন করুন। দেখুন আপনার রেজিস্ট্রেশন কমপ্লিট হয়েছে এবং এপ্রুভাল এর জন্য কিছু সময় চেয়ে একটি ইমেল পাবেন।
৮. এবার আপনার পেয়নিয়ার ইমেইলে Log into Account ক্লিক করলে, আরও ২ টি Security question চাইবে আপনার পছন্দ মত দিয়ে লগইন করুন। দেখতে পাবেন আপনি স্টেপ ২ এ আছেন স্টেপ ৩ তে আসলে এপ্রুভ হবে। আপনার একাউন্ট এপ্রুভ হবার পরেই কার্ড পাঠানো হবে। আপনার Payoneer এর Account Approve হলে নিচের মত একটা মেইল পাবেন। আর কার্ড আসার সময় হলে অবশ্যই আপনার post অফিসে যোগাযোগ করুন।
৯. আবেদনের সময় কোন ভুল বা সমস্যা না থাকলে সাথে সাথে কিংবা ৬-১২ ঘণ্টার মধ্যে আপনি Payoneer Account Approve হয়ে যাবে, যদি আপনি আগে আপনার ডিভাইস থেকে কার্ড এপ্লাই করে থাকেন আপনার একাউন্ট আপ্রুভ হতে অনেক সময় লাগতে পারে / Approve নাও হতে পারে, অথবা কোন ডকুমেন্ট চাইলে তা অবশ্যই আপলোড করে দিবেন। যে কোন সমস্যার সমাধান পেতে পেওনিয়ার সাপোর্টে যোগাযোগ করুন।
১০. Payoneer এর Account Approve হয়েগেলে PyaPal এর জন্য আপনাদের আবার একটি Bank Account এর আবেদন করতে হবে, আর যাদের আগে থেকেই Payoneer Account আছে তারাও আবেদন করবেন। কারন আপনারা Approve হয়ে জাওয়া Payoneer থেকে Bank Account পাবেন তা হল US Payment Service আর এই US Bank Account PayPal এখন আর গ্রহণ করে না। কিছুদিন আগে এ বিষয় একটি টিউন হয়েছিল আপনারা নিশ্চই হুজুগে একাউন্ট করে ফেলেছেন। জারা এগুলা বিষয় সঠিক না জেনে লিখে আমি মনে করি রেফারেল এর আশায় লিখে অথবা তারা দুধের বালক। আমার নিয়মে একাউন্ট করুন অবশ্যই কাজ হবে।
প্রথমে আপনার Payoneer Account লগইন করুন। এরপর Screen এর ডানপার্শে Help> Support Center ক্লিক করুন।
Support Center ক্লিক করলে নতুন ট্যবে নিচের মত Window আসবে এখানে Contact US ক্লিক করুন।
Contact Us এ ক্লিক করলে আবার নিচের মত window আসবে।
এখানে ২টি অপশন পাবেন 1. SEND MESSAGE 2. LIVE CHAT
1. SEND MESSAGE: এই অপশন দিয়ে আপনি যে কোন দিন যে কোন সময় রিকুয়েস্ট পাঠাতে পারেন। SEND MESSAGE এ Bank Account এর আবেদন করলে পুরো প্রক্রিয়া শেষ হবে ৩-৭ দিন সময় লাগবে। আবেদন করতে SEND MESSAGE এ ক্লিক করলে নিচের পিকচার অনুযায়ী তথ্যগুলো দিন। English সিলেক্ট করে
বৈধ পন্থায় আমেরিকা যাওয়ার সপ্ন অনেকেরই। সেই সপ্নপূরনের পথে আরেকধাপ ডাইভার্সিটি ভিসা বা ডিভি লটারি। প্রতি বছরের মত এবারো যুক্তরাষ্টের পররাষ্ট মন্ত্রনালয় আয়োজন করেছে ডাইভার্সিটি ভিসা বা ডিভি-২০১৭ কর্মসূচী।
ডিভি লটারির আবেদন করার নিয়ম
প্রতিবছর বিভিন্ন দেশের প্রায় ৫৫০০০ লোক লটারীর মাধ্যমে এই ভিসা কর্মসুচীর আওতায় আমেরিকায় স্থায়ীভাবে বসবাসের সুযোগ পায়।এই ভিসার জন্য আবেদন করতে কোনো ফি দিতে হয় না। শুধু ডিভি বিজয়ীদের ভিসা গ্রহনের সময় নির্ধারীত ফি দিতে হয়। আবেদন করার সময় যা যা পূরন করতে হবেঃ ডিভি ওয়েবসাইটের নির্ধারিত আবেদনের ফরমে লিম্নলিখিত জিনিসগুলো সতর্কতার সহিত পূরন করবেনঃ
১। আবেদনকারীর পুরোনাম ২। জন্মতারিখ ৩। জন্মস্থান ( প্রার্থী যে শহরে/জেলায় জন্মগ্রহন করেছে/জন্মনিবন্ধন কার্ডে যা উল্লেখ আছে) ৪। দেশ ৫। আবেদনকারীর ছবি ৬। পুর্ণঠিকানা ৭। বর্তমানে যেই দেশে বসবাস করছেন। ৮। ফোন নম্বর ( যদি থাকে) ৯। ই-মেইল এড্রেস ( যদি থাকে) ১০। সর্বোচ্চ শিক্ষাগত যোগ্যাতা ১১। বৈবাহিক অবস্থা ১২। সন্তানের সংখ্যা ( সন্তানের বয়স ২১ বছরের নিচে হলে ) ১৩। স্বামী/ স্ত্রী সংক্রান্ত তথ্য (আবেদনকারী স্বামী হলে এই অংশে স্ত্রীর তথ্য দিতে হবে) ১৪। সন্তান সংক্রান্ত তথ্য একজন আবেদনকারী একটির বেশি আবেদন করতে পারবেন না। তবে স্বামী-স্ত্রী পৃথকভাবে দুইটি আবেদন করতে পারবেন। আবেদন প্রক্রিয়া সফল্ভাবে সম্পন্ন হলে একটি “কনফার্মেশন নাম্বার” সহ আবেদনকারীর নাম ও জন্মসাল দেখানো হবে। ডিভির পরবর্তি ধাপের জন্য এই তথ্যগুলো সংরক্ষন করে রাখা জরুরী।পরবর্তি সময়ে অনলাইনে ভিসা প্রাপ্তি কিংবা স্ট্যাটাস জানতে এই তথ্যসমুহের দরকার হবে।
এই প্রোগ্রামের আবেদন প্রক্রিয়া শুরু হবে ১লা অক্টোবর মধ্যহ্ন থেকে। আবেদনপত্র জমা দেয়ার শেষ সময় ৩রা নভেম্বর মধ্যরাত পর্যন্ত। ডিভির ফল পাওয়া যাবে আগামী বছরের ১লা মে থেকে ৩০ই জুন পর্যন্ত অনলাইনে।
১লা অক্টোবর থেকে আবার শুরু হচ্ছে বৈধভাবে যুক্তরাষ্ট্রে যাওয়ার জন্য স্বপ্নের ডিবি লটারি। ২০১৭ সালের ডাইভারসিটি ভিসা (ডিবি) কর্মসূচি চালু হবে বলে জানিয়েছে যুক্তরাষ্ট্রের পররাষ্ট্র মন্ত্রণালয়।
তবে এবারো ১৮টি দেশের নাগরিকরা ডিবিতে আবেদন করতে পারবেন না। এর কারণ হিসেবে যুক্তরাষ্ট্রের পররাষ্ট্র মন্ত্রণালয় জানিয়েছে, এসব দেশ গত ৫ বছরে ৫০ হাজারের বেশি করে অভিবাসী যুক্তরাষ্ট্রে পাঠিয়েছে।
ভারত, পাকিস্তান, ব্রাজিল, কানাডা, কলম্বিয়া, চীন, ফিলিপাইন, ডমিনিক প্রজাতন্ত্র, ইকুয়েডর, এল সালভাদর, হাইতি, জ্যামাইকা, মেক্সিকো, নাইজেরিয়া, পেরু, দক্ষিণ কোরিয়া, ভিয়েতনাম ও যুক্তরাজ্যের (উত্তর আয়ারল্যান্ড বাদে)নাগরিকরা ডিবি ২০১৬ এর জন্য যোগ্য নয়।
অন্যান্য দেশের নাগরিকরা ১লা অক্টোবর থেকে ৩ নভেম্বর পর্যন্ত আবেদন করতে পারবেন। পরবর্তীতে কম্পিউটার নিয়ন্ত্রিত লটারির মাধ্যমে বিজয়ীদের বাছাই করা হবে।
আরো বিস্তারিত জানার জন্য স্টেট অফ আমেরিকার সরকারি ওয়েবসাইটে যেতে পারেন তবে এখানে অনেকেই দ্বিধাদ্বন্দ্বে আছেন ডিভিতে বাংলাদেশীরা আবেদন করতে পারবে কিনা তাদের জন্য বলে রাখা ভালো এই সুযোগ অনেকদিন থেকে বন্ধ ছিলো কিন্তু অবৈধ অভিবাসন প্রক্রিয়া বন্ধ করতে বাংলাদেশ সহ আরো কয়েকটি কালো তালিকাভুক্ত দেশ এই সুযোগ পাচ্ছে বলে স্টেট অফ আমেরিকার সরকারি ওয়েবসাইট থেকে বলা হয়েছে। ডিভি সংক্রান্ত যেকোন আপডেট পেতে আমাদের সাথেই থাকুন।
কম্পিউটারে মাউস দিয়ে ছোটখাট কাজ করাটা সাধারণ ব্যবহারীদের জন্য খুবই আরামদায়ক। কিন্তু বড় ও জটিল সফটওয়্যারে কাজ করতে হলে দক্ষতা ও গতি বাড়াতে অবশ্যই কি-বোর্ড শর্টকাট জানতে হবে। অভ্যস্ত না হলেও চেষ্টা করে দেখুন, সাধারণ এমএস ওয়ার্ডে লেখালেখির সময়ও কিছু শর্টকাট জানা থাকলে কাজে গতি কতো বেড়ে যায়।
এখানে এমন একশর বেশি শর্টকাটের একটি তালিকা দেয়া হলো:
Keyboard Shorcuts (Microsoft Windows)
1. CTRL+C (Copy) 2. CTRL+X (Cut) 3. CTRL+V (Paste) 4. CTRL+Z (Undo) 5. DELETE (Delete) 6. SHIFT+DELETE (Delete the selected item permanently without placing the item in the Recycle Bin) 7. CTRL while dragging an item (Copy the selected item) 8. CTRL+SHIFT while dragging an item (Create a shortcut to the selected item) 9. F2 key (Rename the selected item) 10. CTRL+RIGHT ARROW (Move the insertion point to the beginning of the next word) 11. CTRL+LEFT ARROW (Move the insertion point to the beginning of the previous word) 12. CTRL+DOWN ARROW (Move the insertion point to the beginning of the next paragraph) 13. CTRL+UP ARROW (Move the insertion point to the beginning of the previous paragraph) 14. CTRL+SHIFT with any of the arrow keys (Highlight a block of text) SHIFT with any of the arrow keys (Select more than one item in a window or on the desktop, or select text in a document)
15. CTRL+A (Select all) 16. F3 key (Search for a file or a folder) 17. ALT+ENTER (View the properties for the selected item) 18. ALT+F4 (Close the active item, or quit the active program) 19. ALT+ENTER (Display the properties of the selected object) 20. ALT+SPACEBAR (Open the shortcut menu for the active window) 21. CTRL+F4 (Close the active document in programs that enable you to have multiple documents opensimultaneou sly) 22. ALT+TAB (Switch between the open items) 23. ALT+ESC (Cycle through items in the order that they had been opened) 24. F6 key (Cycle through the screen elements in a window or on the desktop) 25. F4 key (Display the Address bar list in My Computer or Windows Explorer) 26. SHIFT+F10 (Display the shortcut menu for the selected item) 27. ALT+SPACEBAR (Display the System menu for the active window) 28. CTRL+ESC (Display the Start menu) 29. ALT+Underlined letter in a menu name (Display the corresponding menu) Underlined letter in a command name on an open menu (Perform the corresponding command) 30. F10 key (Activate the menu bar in the active program) 31. RIGHT ARROW (Open the next menu to the right, or open a submenu) 32. LEFT ARROW (Open the next menu to the left, or close a submenu) 33. F5 key (Update the active window) 34. BACKSPACE (View the folder onelevel up in My Computer or Windows Explorer) 35. ESC (Cancel the current task) 36. SHIFT when you insert a CD-ROMinto the CD-ROM drive (Prevent the CD-ROM from automatically playing)
Dialog Box – Keyboard Shortcuts 1. CTRL+TAB (Move forward through the tabs) 2. CTRL+SHIFT+TAB (Move backward through the tabs) 3. TAB (Move forward through the options) 4. SHIFT+TAB (Move backward through the options) 5. ALT+Underlined letter (Perform the corresponding command or select the corresponding option) 6. ENTER (Perform the command for the active option or button) 7. SPACEBAR (Select or clear the check box if the active option is a check box) 8. Arrow keys (Select a button if the active option is a group of option buttons) 9. F1 key (Display Help) 10. F4 key (Display the items in the active list) 11. BACKSPACE (Open a folder one level up if a folder is selected in the Save As or Open dialog box)
Microsoft Natural Keyboard Shortcuts 1. Windows Logo (Display or hide the Start menu) 2. Windows Logo+BREAK (Display the System Properties dialog box) 3. Windows Logo+D (Display the desktop) 4. Windows Logo+M (Minimize all of the windows) 5. Windows Logo+SHIFT+M (Restorethe minimized windows) 6. Windows Logo+E (Open My Computer) 7. Windows Logo+F (Search for a file or a folder) 8. CTRL+Windows Logo+F (Search for computers) 9. Windows Logo+F1 (Display Windows Help) 10. Windows Logo+ L (Lock the keyboard) 11. Windows Logo+R (Open the Run dialog box) 12. Windows Logo+U (Open Utility Manager) 13. Accessibility Keyboard Shortcuts 14. Right SHIFT for eight seconds (Switch FilterKeys either on or off) 15. Left ALT+left SHIFT+PRINT SCREEN (Switch High Contrast either on or off) 16. Left ALT+left SHIFT+NUM LOCK (Switch the MouseKeys either on or off) 17. SHIFT five times (Switch the StickyKeys either on or off) 18. NUM LOCK for five seconds (Switch the ToggleKeys either on or off) 19. Windows Logo +U (Open Utility Manager) 20. Windows Explorer Keyboard Shortcuts 21. END (Display the bottom of the active window) 22. HOME (Display the top of the active window) 23. NUM LOCK+Asterisk sign (*) (Display all of the subfolders that are under the selected folder) 24. NUM LOCK+Plus sign (+) (Display the contents of the selected folder)
MMC COnsole Windows Shortcut keys 1. SHIFT+F10 (Display the Action shortcut menu for the selected item) 2. F1 key (Open the Help topic, if any, for the selected item) 3. F5 key (Update the content of all console windows) 4. CTRL+F10 (Maximize the active console window) 5. CTRL+F5 (Restore the active console window) 6. ALT+ENTER (Display the Properties dialog box, if any, for theselected item) 7. F2 key (Rename the selected item) 8. CTRL+F4 (Close the active console window. When a console has only one console window, this shortcut closes the console)
Remote Desktop Connection Navigation 1. CTRL+ALT+END (Open the Microsoft Windows NT Security dialog box) 2. ALT+PAGE UP (Switch between programs from left to right) 3. ALT+PAGE DOWN (Switch between programs from right to left) 4. ALT+INSERT (Cycle through the programs in most recently used order) 5. ALT+HOME (Display the Start menu) 6. CTRL+ALT+BREAK (Switch the client computer between a window and a full screen) 7. ALT+DELETE (Display the Windows menu) 8. CTRL+ALT+Minus sign (-) (Place a snapshot of the active window in the client on the Terminal server clipboard and provide the same functionality as pressing PRINT SCREEN on a local computer.) 9. CTRL+ALT+Plus sign (+) (Place asnapshot of the entire client window area on the Terminal server clipboardand provide the same functionality aspressing ALT+PRINT SCREEN on a local computer.)
Microsoft Internet Explorer Keyboard Shortcuts 1. CTRL+B (Open the Organize Favorites dialog box) 2. CTRL+E (Open the Search bar) 3. CTRL+F (Start the Find utility) 4. CTRL+H (Open the History bar) 5. CTRL+I (Open the Favorites bar) 6. CTRL+L (Open the Open dialog box) 7. CTRL+N (Start another instance of the browser with the same Web address) 8. CTRL+O (Open the Open dialog box,the same as CTRL+L) 9. CTRL+P (Open the Print dialog box) 10. CTRL+R (Update the current Web )